Welcome to my Christmas Blog, A Debbie-Dabble Christmas!!
I am so happy you decided to stop by my Christmas Blog!!
Every room in our townhouse has a different Christmas Theme and Color Scheme!!
I prove that you do not have to live in a large home to have several Trees, over 20, in all shapes and sizes!!
The majority of my Christmas decorations are placed in the same room every year and I know that this is not what most Decorator's care for but to me, it like seeing old friends again when I decorate each year for Christmas as many of my decorations were gifts from family and friends...........
The majority of my Christmas decorations are placed in the same room every year and I know that this is not what most Decorator's care for but to me, it like seeing old friends again when I decorate each year for Christmas as many of my decorations were gifts from family and friends...........
I do try to add a few new things and change up things a bit but for the most part, these decorations are part of my Christmas Traditions and bring back a lot of treasured memories.....
I post 3 TIMES A WEEK on MONDAY, THURSDAY AND SATURDAYS.....
As always, click on each picture if you would like to enlarge it....
PINTEREST
A NOTE ABOUT COMMENTS
I
enjoy reading your comments and will return the favor by visiting and
commenting on your blog or reply to you directly here if you do not have
a blog but I do have my comment section set to Moderation due to
spammers and hackers so your comment will not appear immediately...
And since I have a very busy life, like most of us do, it may take me awhile to return your comments but I promise I will....
----------------------------------------------------------------------------------------------------------
In my last post, I shared how I decorated the top of the small curio and the hutch in the Dining Room a bit differently this year for Christmas....
Click HERE if you missed that post!!
And now for a few Personal Notes...
On
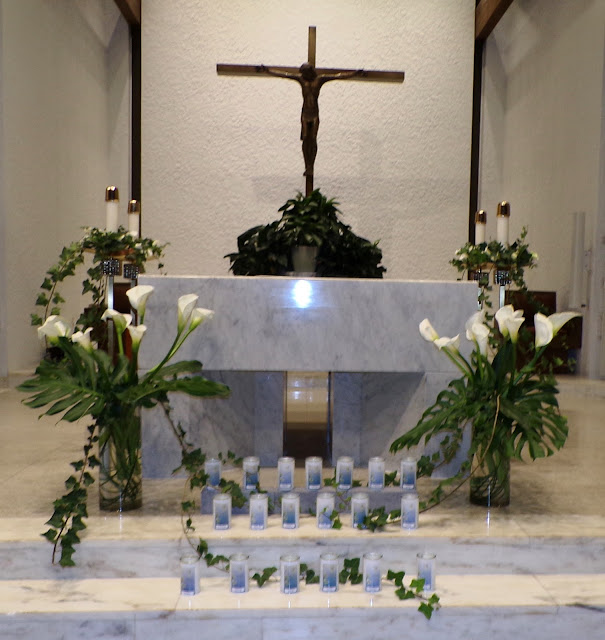
November 4th, a special All Soul's Memorial Mass for the members of my
parish who passed away in the last year was celebrated at Saint Maria Goretti.....
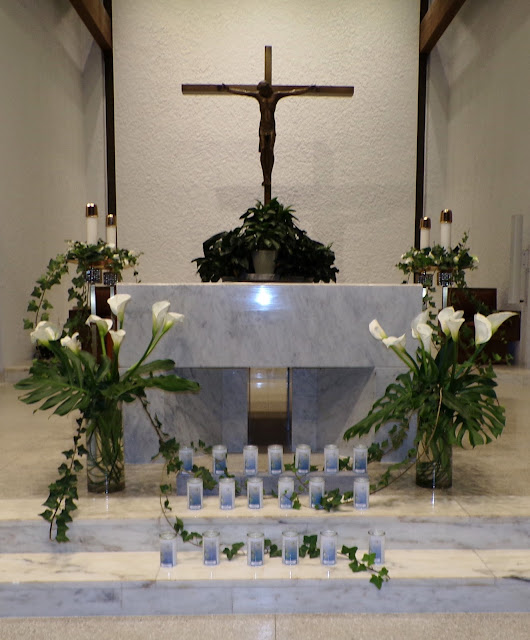
19 candles were placed on the altar in memory of the 19 members of our parish that passed on this year, including Joe....
Family members gathered in the small chapel we have in the back of the church, where daily Masses are said.....
We
each were given candles and when our loved one's name was read and a
bell was rung, each one walked up to the altar, gave the lit candle to
Father Alex, who then lit the candle on the altar in honor of our loved
one......
It was a beautiful Mass and Father Alex gave a touching homily as he himself lost his beloved Step Dad this year....
I now have this candle in my Living Room Hutch with the beautiful clock that holds Joe's ashes....
On
November 15th, I will be attending a similar Mass remembering my BIL
and Cousin, who both also passed away this year, with my sister, Barb,
at her church........
Barb attended the Mass at my church with me....
The
husband of one of my local FB friend's repaired the hole in my ceiling ...
Caused by the repair of a leaking pipe that supplies cold water to my upstairs bathroom....
After letting the dry wall compound dry, it was my turn to texture it to match the rest of the ceiling....
Thank
goodness I saved the rollers we used over 30+ years ago when all the
nail heads popped in both my Living Room and Dining Room ceiling after
my new replacement windows were put in....
Yes,
that actually happened as the Living Room was a really tight fit and
they had to work hard to get it in and the next thing we knew is all and
I do mean all the nail heads in the ceiling of both rooms popped!!
It
was easier to just texture the ceiling rather than hammer back in over
100 nail heads and spackle each individual one and then paint.....
I then finished it off by painting that area of the ceiling....
And with that being said, I will start this post by sharing the soffit between the Dining Room and the Living Room which contains the hot water pipes to my upstairs bathroom.....
This is where I hung my collection of Guardian Angel Plates.......
I replaced a Home Interiors picture that normally hangs here with this Christmas sign that was gifted to me by a friend.....
Take notice of the ceiling...
In the corner.....
My new Dining Room Tree!!!!!
National Tree 6ft. Linden Spruce Slim Christmas Tree
Last
year, I was trying to decide if I wanted to keep the 7 1/2 ft. pencil
Tree that I have set up in the Dining Room for several years....
I had to bend down the top branches to fit it under the soffit.....
And I did not want to be hauling it back and forth to my storage shed myself......
Like Joe used to do...
So because of the circumstances of this year, I decided that after I strip all the lights off of it, I will donate it to Salvation Army.....
Maybe.....
Or I may use the branches for greenery....
Stay tuned on that one...
This new Tree is actually about 5 1/2 ft. tall as a good 6 inches is the top branch of it......
And it is only 20 inches wide....
It is a much better fit in the corner of the Dining Room and
will be much easier for me to handle the storage of it as it only weighs about 8 pounds...
The Tree was on sale in Boscov's for $38.99.......
But I had a 15% off coupon which took it down to only $33.....
Amazon's price for the same Tree is $42.99
Michael's price for the same Tree is $47.99
And Bed, Bath and Beyond's online price is $55.99
I prefer unlit Trees as I like to put my own warm white LED lights on my Trees.....
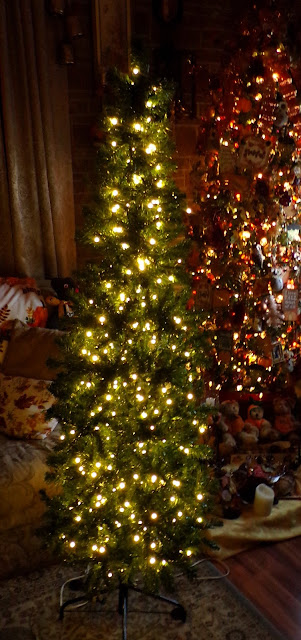
And here it is all fluffed out.....
No it is not one of those new Trees that have life like looking branches.....
They cost a small fortune and I did not really want to pay a lot of money.....
The top of the Tree's branches will not hold really heavy ornaments but I can work around that.....
The bottom branches are stronger and can easily support heavier ornaments....
And it has a metal stand and not a plastic one....
I bought these 2 sets of Warm White frosted bulb LED lights for the Tree.....
I ran out and bought one more set of these lights so there are 600 lights on this 6 foot Tree as the rule of thumb is usually 100 lights per foot of Tree when lighting a Tree.....
Many years ago, when HGTV actually aired many different Christmas shows and specials, I watched one on the decorating team called Mr. Christmas...
He shared how to properly light a Tree by first lighting the trunk of the Tree with larger light bulbs.....
I did not use larger ones like I have in the past with my above 6 ft. trees but I did wrap the trunk of this Tree with lights...
Then I wrapped lights around each branch from the back by the trunk to the front of the branch....
I just found out that Mr. Christmas has a Netflix show so I will definitely be checking that out!!!
The new Tree fits perfectly in the corner of the Dining Room......
I place the Tree I use here on a glass table round that I adhered felt pads to the bottom of which allows me to slide the Tree in and out of the corner when decorating it.....
Now let me show you this whole corner completely decorated......
Before I get to the Tree, I want to share the cabinet that I moved down to the Dining Room from my bedroom in the Summer.....

We bought it at a yard sale several years ago for $5 and Joe used it up in his Pittsburgh corner by his desk and stored Sports things inside of it....
I now store glassware and other items inside of it and was pleased that it actually goes well with Joe's Grandmother's Dining Room furniture.....
And it also gives me another surface to decorate!!!
In the Summer, I decided to spray paint this sliver mirror tray gold.....
I decided to display my small collection of Dept. 56 Snow Babies here this year....
All of them were gifted to me by friends.....
I also used bright green bottle brush trees and pink glittered birds....
The gold swirly tree was previously used in the upstairs hall way
Next, I want to show you the window divider between the Dining Room and the Living Room in this corner......
I bought the pink Season's Greetings sign in Michael's many years ago.....
Sorry for the light reflecting in it from the Tree...
When I ran to Dollar General to get another set of lights for the Tree, I saw these Bells there for only $5!!!
Speaking of the other side, I added a bow that I made in the pink glittered ribbon, which I used on various decorations in the Dining Room, to the wreath I hung on the divider on the opposite side of the room as this wreath was used originally as a centerpiece....
I also added some white beads.......
Okay, now we will get to the new Tree......
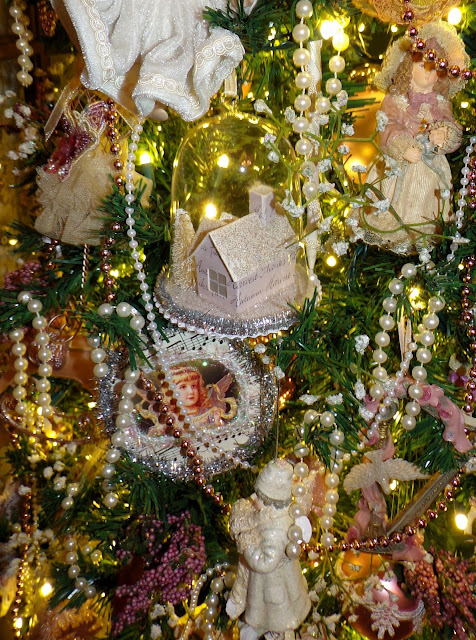
I went back to my Victorian roots with decorating this Tree this year because the smaller branches made it a lot easier than the other Tree which had larger "cashmere" branches....
I also decided not to use the white tinsel garland that I used for several years on the Dining Room Tree....
When watching a few You Tube videos, I saw that many vintage style decorators were going back to the beaded garlands that I love but instead of adding them to the Tree after the lights and before the ornaments as Mr. Christmas taught me to do on that TV show, they were adding the beaded garland after hanging the ornaments....
I liked the look and decided to give it a try.......
First, a look at the Tree without the lights on.....
I used all the Victorian style ornaments that I have collected for many years......
The same bow topper made from 2 different types of pink ribbon....
And I checked my crafting stash and found a pink wired beaded garland and a smaller white beaded garland.....
But I did not stop there and decided to "drip" the Tree in beaded "Icicles".....
Many years ago, at a pool business that transformed to a Christmas Wonderland during the Holiday Season, I saw that they cut strands of the beaded garlands and draped them on the branches like the silver tinsel icicles.....
The smaller width of the Tree made it impossible to use the half of a tree collar that I used with the older Tree.....
So I simply wrapped the bottom of the Tree with a pink tablecloth that I had!!!
I placed one of my Victorian dolls, a rocking horse I bought in Dollar General 2 years ago and a white and gold putz house at the base of the Tree......
And now a closer look with the 600 lights on!!!
I am so thrilled with how this Tree came out and so thankful that I decided to buy it!!!
Now let's take a look to the side of the Tree.....
I added a bow and angel wings to the top of the wall clock that Joe gifted me.....
To the right of the Tree, on a marble topped stand that was a flea market find many years ago......
Is a beautiful pink Santa.....
I bought this handsome gentleman at a church flea market for a mere $5!!
I embellished him a bit with a flower and a few beads....
I placed a pink and white bottle brush tree, bought in Dollar Tree this year, inside of an antique child's Christmas cup that my friend Anne Marie gifted me....
The pink lace table topper is a handmade item I bought on Ebay several years back.....
I hope you enjoyed seeing how I decorated this new Tree in my Dining Room this year....
As much as I enjoyed doing so!!!!!
So I hope you will stop by to visit again on THURSDAY!!!!
Stay safe, healthy and most of all, HAPPY!!
Thanks to those who took the time out of their busy day to spend a little bit of time with me!!
Thanks to those who took the time out of their busy day to spend a little bit of time with me!!
If you do not have a blog, PLEASE give me some way to reply to your comment, maybe by including your email in your comment. If I can not find a way to reach you, I will reply on the post where you commented so please check back......
I am linking up to these parties:
TUESDAY
Inspire Me Tuesdays
Lou Lou Girl's Linky Party
Tuesdays with a Twist
Tuesday Turn About Link Party
Inspire Me Tuesdays
Lou Lou Girl's Linky Party
Tuesdays with a Twist
Tuesday Turn About Link Party
THURSDAY
Please take some time to visit these terrific hosts and all those joining in on the fun!












Your new tree is lovely but my favorite is the santa by the branches!
ReplyDeleteWow Debbie, you got the new tree for a great price! I love the way you decorated it and the ornaments and the beads look so pretty. The Santa is so nice too. I hope you enjoy the rest of the week.
ReplyDeleteYou can't even tell the ceiling was repaired and touched up! You did a great job. That new tree is lovely.
ReplyDeleteThank you for the step by step process for the lighting and decorating. Your tree is just so beautiful.
ReplyDeleteI used to attend the All Saints Day mass every year. At our country church, each name was announced and a family member or members would walk up the aisle with a candle while a special prayer was said for each person we lost. I was quietly asked to linger in the back every year and represent someone whose family was unable (or sometimes unwilling) to participate. It was an honor. Times have changed and I am not sure what is going on anymore. But I treasure my memories of the years I was able to honor those persons.
Wow Debbie I don't know where to start! I'll start by saying what a beautiful mass, hearing about it made me teary. And your victorian decorations and decor are just so warm and welcoming.
ReplyDeleteVisiting today from SSPS.